Are you making the most out of your Procore construction management software? In this blog series, I provide Procore tips that will optimize your construction processes, saving you time and money. As robust as the software is, these helpful tips only scratch the surface of what Procore can do. If you’re looking to dive deeper or get started with Procore, reach out to our Technology Consulting team.
Explore our other Procore optimization tips:
Submittals can be one of the most time-consuming tasks on any construction site. To make the submittal process less tedious, the custom stamp feature allows you to add stamps directly into Procore and removes the chaos of downloading, reviewing, stamping, and reuploading documents. All teams and users can benefit from custom stamps and save hours of time. I’ve been in the industry for over 16 years and this functionality is near and dear to my heart. My first role in the construction industry was as a project administrator where document control was my responsibility and can attest firsthand to how custom stamps improve the submittal process.
This simple tip is only two steps, so there’s no reason not to take advantage of this feature.
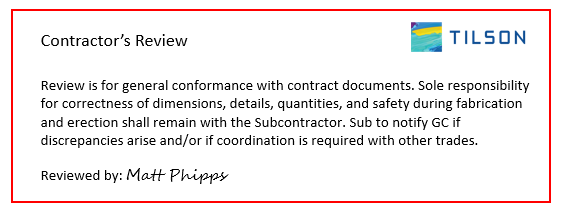
Step 1: Before opening Procore, the first step is to create a custom stamp image and save it as a JPG or PNG file. Below is an example of a custom stamp image that I created in PowerPoint, but any program that allows you to create images will do:

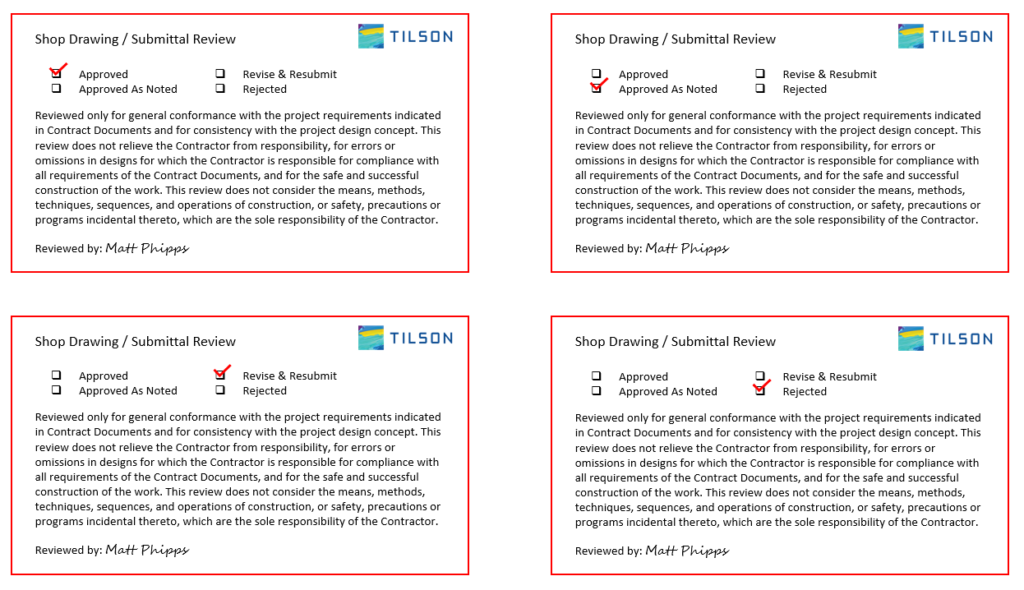
While the above example may be used by a general contractor, a design team may prefer a collection of custom stamps like the examples below:

Now that we have our custom stamp or stamps saved as images, it’s time to open Procore.
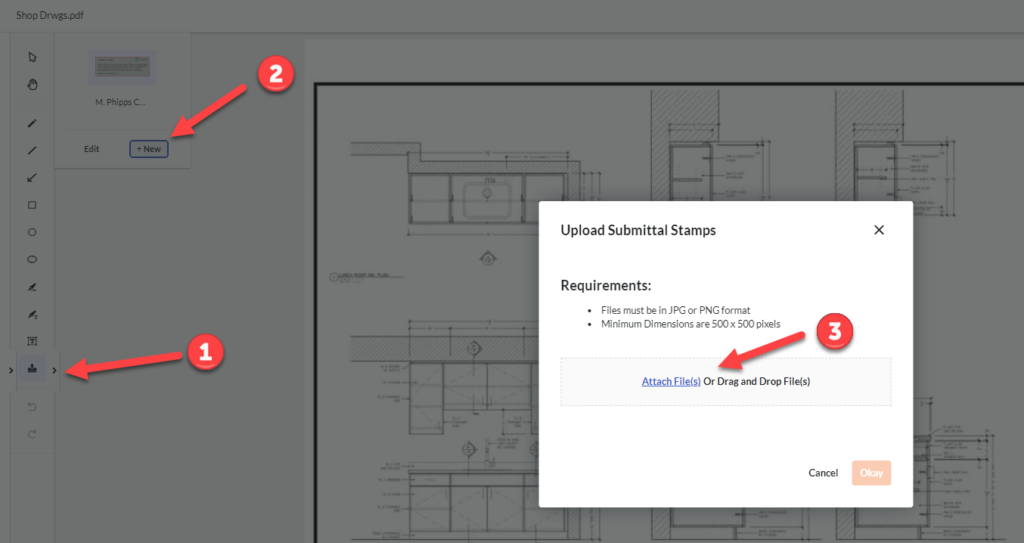
Step 2: Once a submittal is received and opened in Procore, click the stamp icon on the left-hand menu and select “+New”. Locate where you saved the JPG or PNG file you created in Step 1 and attach it.

All done! Two simple steps and you’re ready to go. This uploaded custom stamp is now available to you for the rest of the project. Moving forward, clicking the stamp icon on the lefthand menu will pull up your saved custom stamp which you can quickly click and add to the current document. This removes the hassle of downloading, reviewing, stamping, and reuploading documents – now it can all be done seamlessly directly in Procore.
Our second tip in our Optimizing Procore series is simple to implement yet saves time and improves document organization. To continue learning more tips like this, connect with Tilson on LinkedIn and be the first to see the next tip in this series. If you missed our previous blog post, click here to learn how to create fillable forms in Procore.
Not every feature in Procore is as straightforward and it takes an expert to make the most of this robust construction management tool. Our team is available to show your organization how to optimize or get you started with Procore.

As a Technology Consultant with Tilson’s Construction IT Consulting team, Matt provides clients end-to-end guidance for software selection and implementation as well as systems training. Matt joined Tilson in 2022 with over 15 years of experience in construction technology and ERP systems, along with a history of successful operational training and process improvement. Matt holds a bachelor’s degree in Business Administration from the Bethel University in Indiana.